
When we bought the new house, we were pretty certain that we weren’t going to keep those half-striped walls, cyclist borders, wild mural (which was originally covered up by a lovely corded fabric), and stained carpet in my son’s room-to-be. If I were Alex, I would have been terrified to sleep anywhere near that building with the crazy eyes.
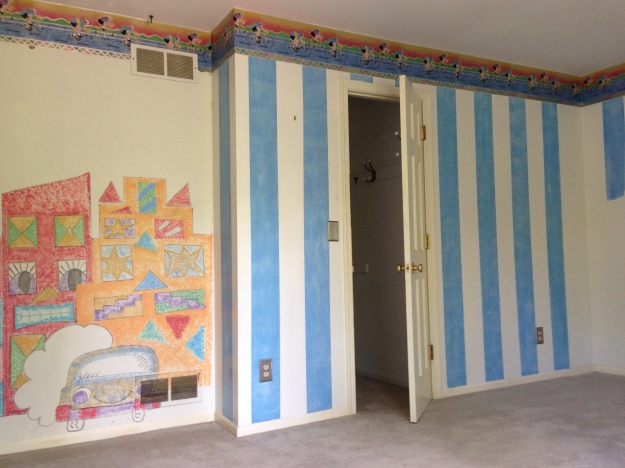 So, in an effort to avoid inflicting long term psychological damage to my child, Alex’s room got fresh paint from ceiling to walls to trim. The carpeting is new. I even painted the closet interior. It now looks fresh and happy.
Alex’s favorite part of his new room is his chalkboard wall. He’s been practicing writing his name everyday at school and he likes this space to practice.

My favorite part about this chalkboard wall is the color! I wanted to choose something complimentary to his room, and I didn’t want to be restricted to chalkboard green or black. Custom chalkboard colors are surprisingly simple to make. This tone, Rainstorm (Sherwin Williams 6230), produced a nice dark background for a chalkboard and looks great with the walls (Languid Blue, 6226), since they’re in the same color family.

I had already painted the interior of his bookshelf with the same family of colors as well. The addition of a Lego table from Grammy and Pappy this Christmas has made his room a favorite spot.

Custom colors of chalkboard paint are surprisingly simple to create.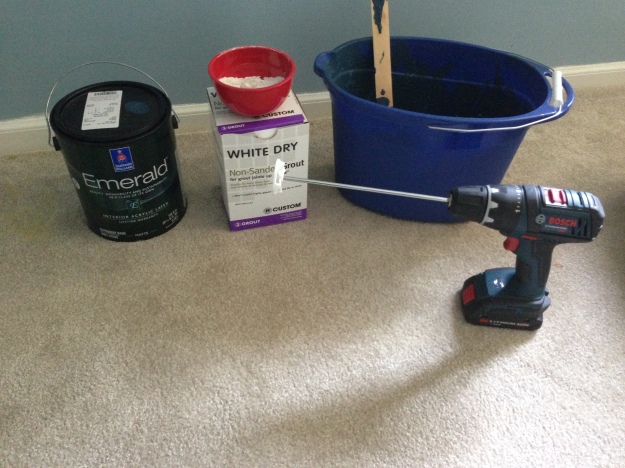
You’ll need:
nonsanded grout
matte paint in color of choice
mixing bucket (or cup, for smaller amounts)
Nice to have:
a drill bit paint stirrer
Simply mix grout: paint in a 1:8 ratio (½ cup grout per quart of paint). Fully mix in grout so that granules are not visible. The drill bit paint stirrer is nice to have to help with the mixing, but it certainly isn’t necessary. Be advised, this stuff is gloopy. Even when fully mixed, it’s just thicker and less easy to apply than paint. It’s a bit more difficult to trim out as well. Nonetheless, it still looks quite nice when it’s dry. I did paint 2 coats, just to ensure full coverage.
You’ll want to let the walls set for 3 days after painting. Then go over the entire wall with chalk and wipe off with a damp cloth. After this process, your chalkboard is ready to use!

After several months of use, the chalkboard was becoming quite difficult to restore to its original state of cleanliness.

After wiping it down with a sponge and water, it still was dirty.

So I turned to the internet and discovered this crazy trick. Coke (or Dr. Pepper). Scrub that chalkboard wall with a bit of pop and restore them to their original glory.
 Weird. But it works pretty darn well. And I did go back over them with water, just to remove the pop.
There you have it! Custom chalkboard walls.


Ali! What kind of container is that for the chalk? How is it installed? LOOKS GREAT! Now just have to wait for the famous 40% SW sales 🙂
LikeLike
It’s one of those 3M containers with the translucent adhesive strips that comes off paint cleanly. I found it at Target. I’m still on the hunt for something a bit more unique though. I’m also on the wait for the SW sales too. I have some kitchen chairs I’m excited to paint next.
LikeLike